In this article, you'll learn how to create Course Awards that you deploy to the PlayZone or ProShop. You'll also see how to create Event Awards.
Click/tap the thumbnail above to watch the video of this tutorial.
1. Getting Started
Awards are an important part of the SellPro user experience. They incentivize users to complete Courses. When they do, they earn SellPoints – which they can use to earn awards either by playing the Gravity Game in the PlayZone, or by spending them in the ProShop.
It's a requirement to attach at least one Award to your Course before it can be activated.
Important: Before the award can be activated, you must have some physical or electronic award inventory already purchased and set up in the OMS. The Award inventory for your account is managed by your Client Service contact. If you want to purchase and set up inventory, or have any questions about your inventory items, contact Client Services.
This article assumes that you already have some inventory available to use, and will begin from the point of creating a Single Course Award that will be attached to Courses.
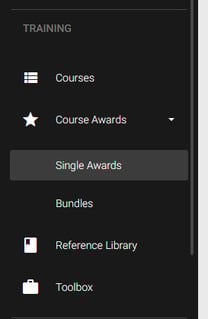
Log into the SellPro Online Management System (OMS), and look for COURSE AWARDS in the sidebar. Then, choose from SINGLE AWARDS or BUNDLES.
Use the BUNDLES option when you want to create an award that includes multiple inventory items. There are two types of bundles: Pick One and Pick Many, and each has its own use case:
- Pick One. Offer users who earn the award a choice of one from a selection of two or more inventory items.
- Pick Many. Offer multiple items together as a single award.
The Awards list shows all the Awards that have been previously created. If you wish to edit an existing Award, select the EDIT![]() icon next to that Award. Awards can be edited as long as they have not been activated.
icon next to that Award. Awards can be edited as long as they have not been activated.
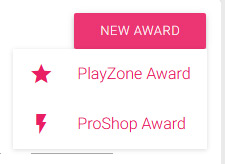
Select NEW AWARD, then choose from PlayZone Award or ProShop Award.
2. Setting Up the Award
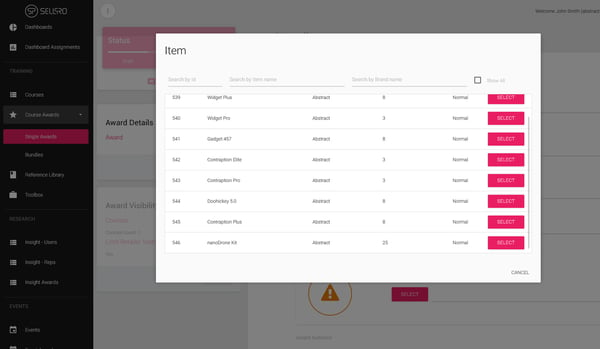
You are presented with the inventory list, which shows all of the inventory items that have quantity available to use. Each product is listed by name and ID number, along with the available quantity.
Award creation screen. First, select the inventory item you want to use from the list.
After selecting the inventory item, some of the fields will be filled in automatically with information that was saved when the inventory item was created. You will need to manually fill out the remaining fields, some of which include:
- Award Audience. Determines who will be able to see the Award in the app.
- Brand Reps exposes the award only to your internal field team.
- Store Associates exposes the award to all SellPro users.
- Award Type. Use SWAG only for brand promotional merchandise.
- Assigned Award Quantity. Reserves the quantity of an available inventory item for use by this award. Enter the number you wish to assign. When deciding on the quantity of inventory to use for your Award, consider for how long you intend to keep the Award active, and how often you want SellPro users to earn the award.
Example: If your active award period is 30 days, and you want to award your assigned inventory frequently, you could use 30 total from your inventory. This way, SellPro will automatically distribute an Award to one SellPro user for each day of the active period.
- Active From / Active To. These dates determine the period during which the Award is live in the PlayZone or ProShop. This controls how often the award can be earned by distributing inventory automatically across the entire active period. Inventory is dispersed evenly without running the risk of awarding too many too early, or not enough before the period ends.
- Sub Periods. Use Sub Periods to increase or decrease the frequency of award distribution over the course of the active period. Set the start date for each sub period you wish to include, and then enter the percentage of assigned inventory you want to distribute during the sub period. Typically, most completion rates on SellPro Courses happen during the first week after it’s been launched, and using Sub Periods are a great way to take advantage of this by distributing more during that time.
- Max Questions. Determines how many questions will be asked when the user lands on the award in the PlayZone and takes the Award Quiz.
Tip: Award Quiz questions are randomized from a pool of all the Courses attached to that Award, and the Award Quiz is also timed. Therefore, set this field to a number that will allow the user to answer all the questions reasonably while keeping the Award’s value in mind. No more than 3-4 questions is recommended.
3. Visibility
Visibility settings determine who will see the Award when it is activated in the SellPro app.
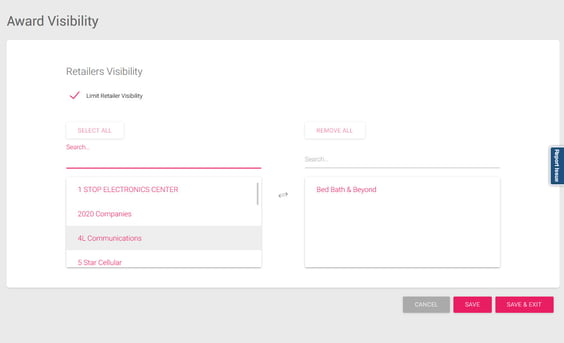
- Retailers Visibility. This option is unchecked by default, which means that the Award will be visible to the same users that are exposed to the associated course(s). If you want to limit this to certain Retailers, uncheck this box and select your desired Retailers.
Award Visibility Settings.
4. Award Activation
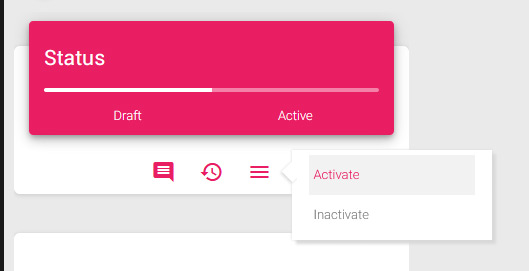
Awards don't need to be approved for Activation the same way that Courses and Events do. You can activate the Award yourself as soon as it's ready.
Once the Award is active, you may attach it to your desired Course(s) by navigating to COURSES and attaching the Award using the Awards step within each desired Course.
You can attach any number of awards to a single Course, and an award can be attached to any number of Courses.
Activate the Award from the Status Bar.
Tip: Have a high-value award? Attach it to more Courses. This way, SellPro users will have to certify on more Courses in order to unlock the Award, making for a greater incentive.
5. Event Awards
For OMS users who have Events access, creating an Event Award follows nearly the same process as creating a Course award.
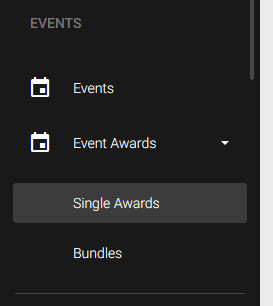
Go to EVENTS in the OMS sidebar, then look for EVENT AWARDS. Choose the desired Award type.
To begin creating a new Event Award, select NEW EVENT AWARD  , then select the inventory item you want to use for the Event Award from the Item List.
Note: Because this is for an Event and not a Course, some of the fields under the Award Details are not not present. For example, there is no Max Questions field under Details, since this award is not attached to a Course with a Quiz. There are also no Visibility settings, because the award won’t be seen in the PlayZone or ProShop sections of the app.
For the Award Details, fill in any empty fields, assign the award Quantity, and set the Active Period the same way you would for a Course Award.
After selecting SAVE & EXIT  , the Event Award an be activated. Event Awards do not require approval from a Brand Admin, they can be activated directly from the Status Bar.
Once activated, the Award is ready to be attached to any of your Events. You can do this by navigating to the desired Event (if you have already created it), and using the Awards step to attach it.
Tip: When it comes to hosting multiple Virtual Events, it’s typical to have multiple instances of the same event topic offered at different time slots to give users flexibility to attend. Therefore, it’s a good practice to assign one award for each event topic, not for each time slot. This way, SellPro users can’t unfairly earn the same award multiple times, even if they attend all the time slots for that same topic.
Want to learn more about how to use SellPro's Online Management System to create awesome training and brand awareness content for retail personnel? Check out more articles in the SellPro Client Guide.

