How Do Sales and Sale Products Work in SellPro OMS?
Learn how Sales and Sale Products work together to support product launches, motivate measurable selling activity, and reward users with SellPoints.
Sales connect product education and engagement to a clear action: making a sale. With this OMS feature, you can create a Sale around one or more products, make it available to selected retailers, and assign SellPoints as the reward. Eligible users make a qualifying sale, upload their receipt, and receive SellPoints after the receipt is verified.
Important: Before you can create Sales or Sale Products in OMS, the Sales feature must be enabled for the retailer that will participate. Enabling Sales automatically makes Sale Products available. Contact your SellPro Program Manager to request that Sales be enabled for the participating retailer.
Sales and Sale Products: What Is the Difference?
- Sale Product: An individual product that can be added to a Sale.
- Sale: A time-bound sales incentive that brings together one or more active Sale Products.
Both features are located under Campaigns in the OMS. Create and activate your Sale Products first; only active Sale Products can be attached to a Sale.
Why Use Sales?
Sales connect product knowledge to a specific selling objective and recognize verified action with SellPoints.
- Support launches and promotions. Feature the products that matter during a defined campaign period.
- Set a measurable goal. Want participants to complete a specific number of sales? Add a sales task to an Engagement Campaign, where you can set the required sales count as part of the campaign’s completion requirements. Learn how to add sales tasks to an Engagement Campaign.
- Reward verified action. Users earn SellPoints after AI verifies the uploaded receipt.
Common Uses
- Product launch: Add each new product as a Sale Product, then group the products in a Sale for the launch window.
- Limited-time promotion: Feature selected products during the promotional period and reward verified sales with SellPoints.
Create a Sale Product
-
Under Campaigns, open Sale Products.
-
Click CREATE.
-
In Product Details, complete the Name, Brand, Description, and Price fields.
-
Click SAVE & EXIT.
-
Open the hamburger menu (three lines) for the Sale Product and select ACTIVATE.
Use a recognizable product name, a description that distinguishes the item from similar products, and an accurate price.
.png "Product Details screen")
Create a Sale
-
Under Campaigns, open Sales.
-
Complete the Details section. Enter the Title, Description, Brand, Country, Dates, Time Zone, and Language, then click SAVE & EXIT.
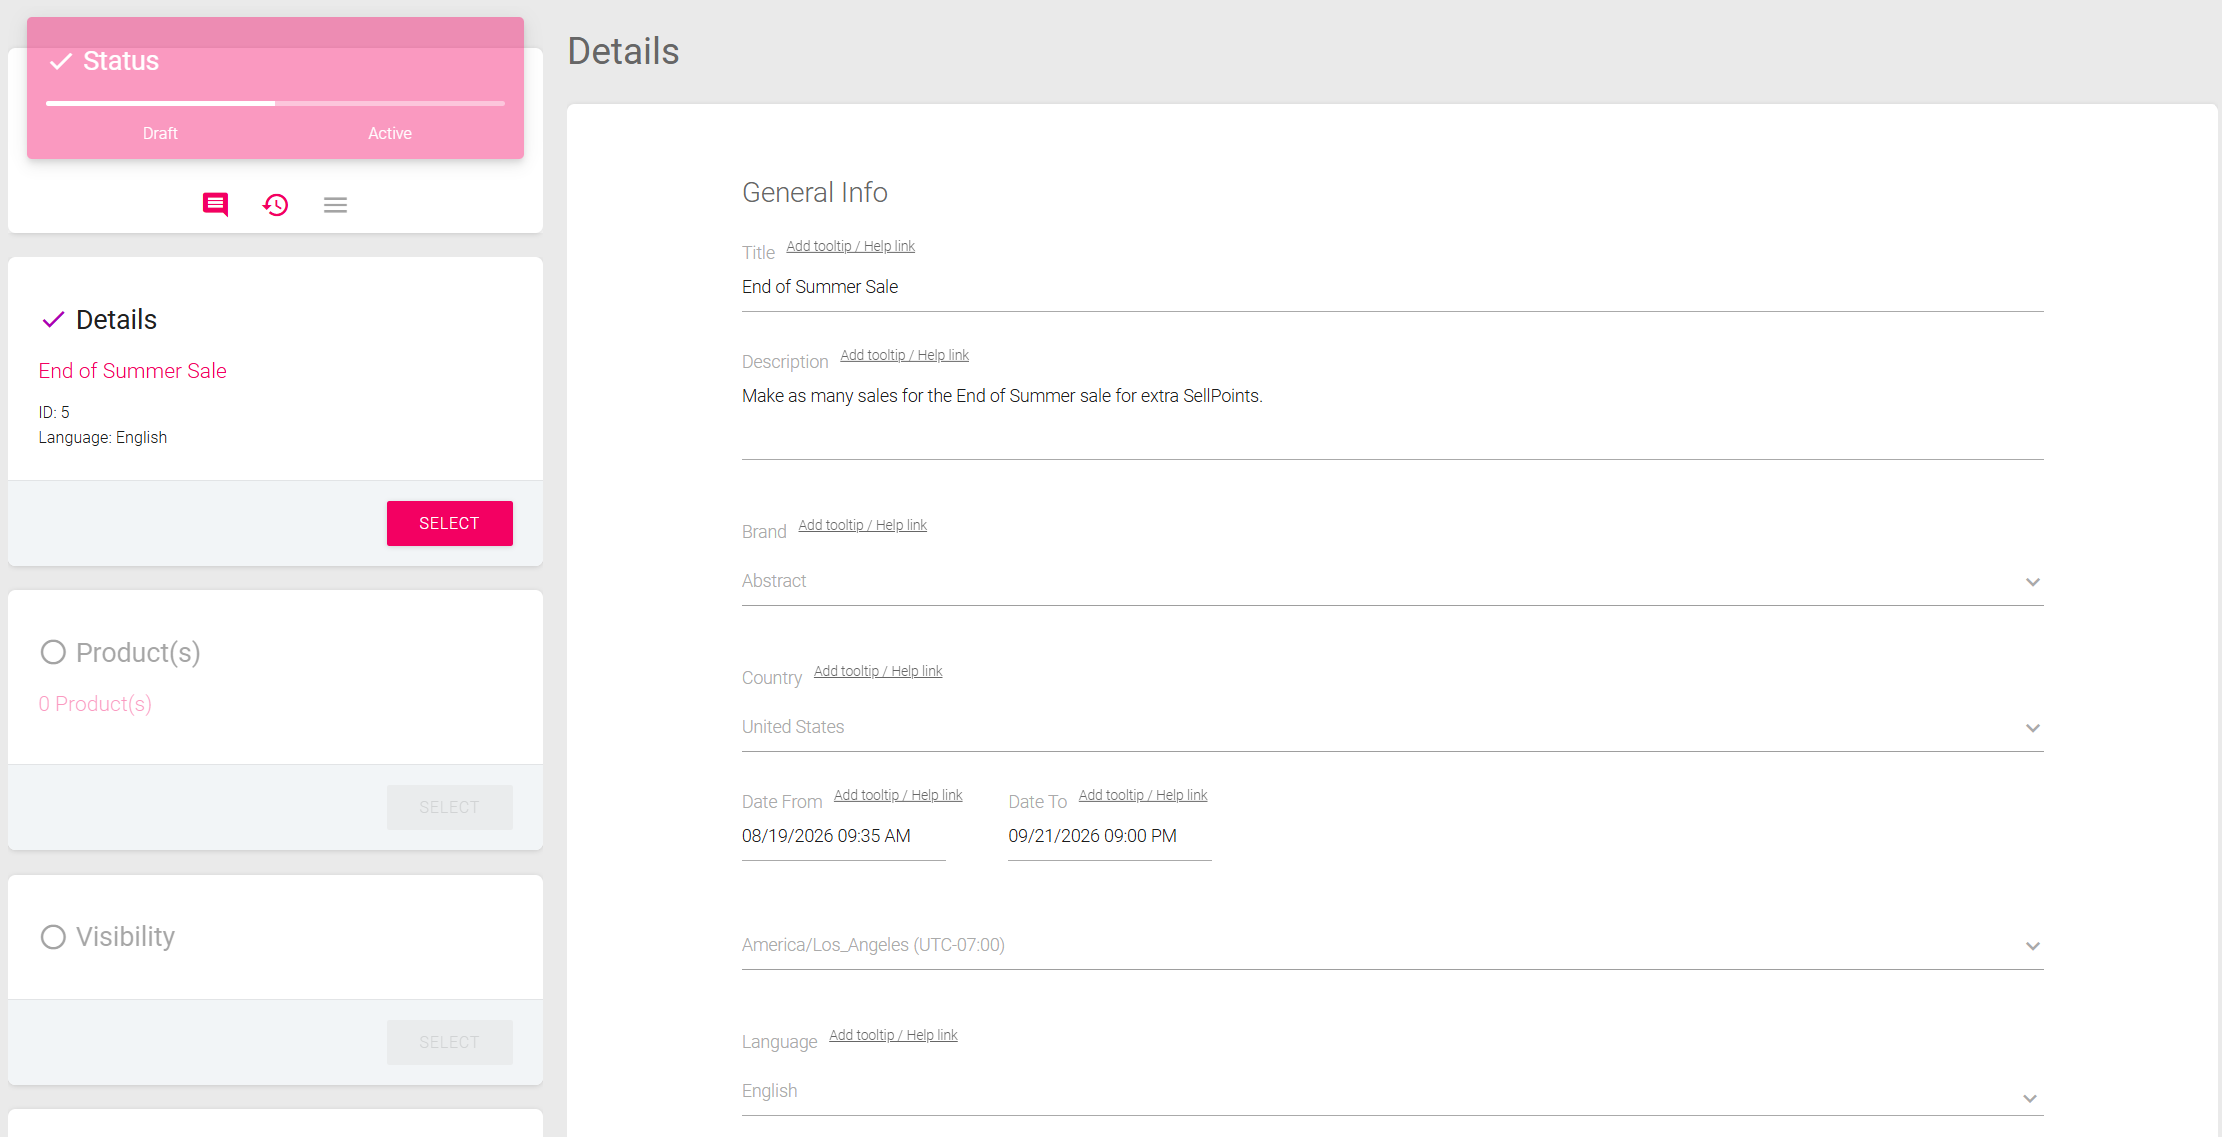
-
Add Sale Products. In the Product(s) section, click SELECT. Choose the active Sale Product or Products you want to include, then click SAVE & EXIT.
-
Set Visibility. In the Visibility section, click SELECT. Choose the retailer or retailers that should have access to the Sale, then click SAVE & EXIT.
-
Assign SellPoints. Click SELECT in the SellPoints section and enter the desired SellPoints amount for each retailer. If multiple retailers are selected, you can apply the same SellPoints amount to all retailers or assign a different amount to each retailer. If the Sale is visible to only one retailer, enter the desired amount for that retailer. Click SAVE & EXIT.
-
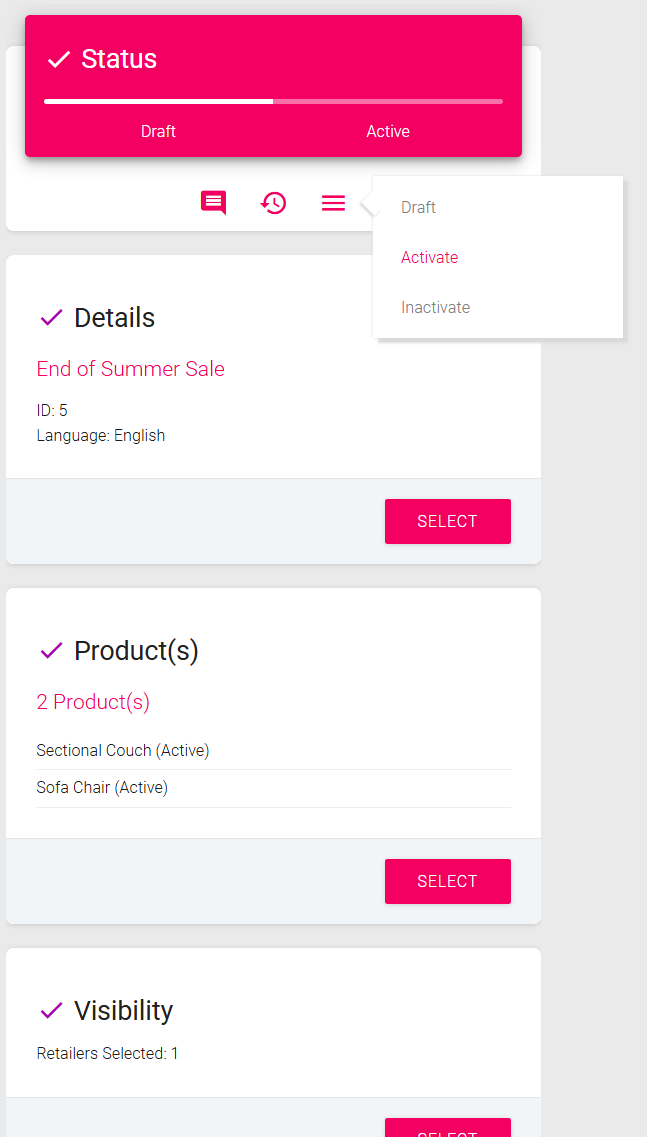
Confirm setup is complete. Each section should display a checkmark when all required information has been entered.
-
Activate the Sale. Open the hamburger menu (three lines) and select ACTIVATE.
Recommended Practices
- Start with the objective. Decide which launch or promotion the Sale should support before selecting products and dates.
- Keep the Sale focused. Include the products that directly support the initiative so the expected action is easy to understand.
- Align the timing. Match the Sale dates and time zone to the launch or promotional period.
- Review visibility and rewards. Confirm the correct retailers and SellPoints amount before activation.
Was this article helpful?